Introduction
Bringing your 1/72 scale figures to life requires more than just assembling and painting them. If you want to achieve a truly realistic look, it's essential to focus on texture and detail. Adding layers of realism involves techniques that enhance the surface of your figures, such as weathering effects, fine detailing, and creating lifelike surfaces on uniforms, skin, and equipment. In this guide, we’ll explore how you can elevate your 1/72 figures by applying textures and details that make them look less like miniatures and more like living, breathing subjects.
Why Texture and Detail Matter in 1/72 Figures
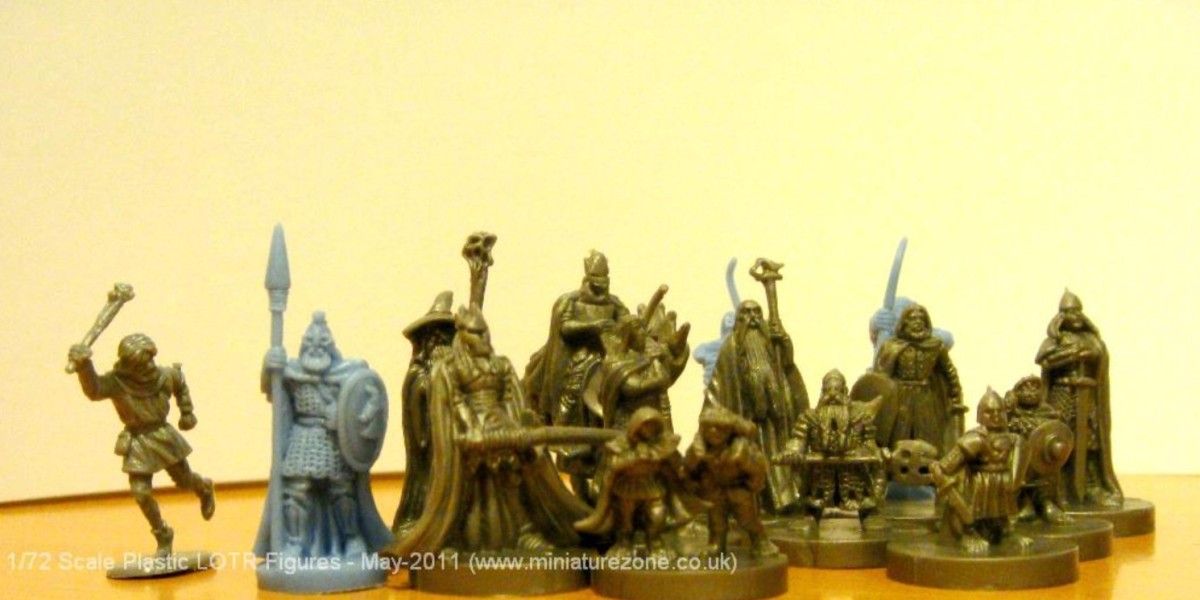
At 1/72 scale, figures are only about 1 inch tall, which makes it challenging to create the illusion of texture and depth. However, adding texture to uniforms, skin, and weapons is crucial for achieving realism. Fine details like the grain of fabric, wrinkles in clothing, or weathering on armor can turn a simple model into a striking and visually compelling piece.
Essential Techniques for Adding Texture and Detail
1. Dry Brushing for Surface Texture
Dry brushing is a fundamental technique used to highlight raised areas and simulate texture on your figures. This method is particularly effective for creating depth on uniforms, skin, and weapons.
- How It Works: Dry brushing involves dipping a brush in paint, wiping most of the paint off, and lightly dragging the brush over the raised surfaces of the figure. This leaves subtle highlights that bring out the texture.
- Best Uses: Use dry brushing to highlight fabric folds, metallic surfaces on weapons, and detailed parts like straps and belts.
- Pro Tip: For a more realistic effect, use a lighter shade of the base color for the dry brush. For example, if your figure's uniform is olive green, use a light green or yellow-green to highlight it.
2. Washing for Depth and Shadow
Washing is another popular technique for adding depth to 1/72 figures. A wash is a thinned-down paint that flows into the recesses of your figure, enhancing the shadows and giving the figure a more three-dimensional appearance.
- How It Works: Apply a wash over your base coat, allowing it to flow into the crevices. The wash darkens the recesses, creating a natural shadow effect.
- Best Uses: Washes are perfect for deepening details in areas like folds in clothing, gaps between equipment, and facial features.
- Pro Tip: Use darker washes for skin tones and equipment, and experiment with black or brown washes for adding weathered, dirty effects to uniforms.
3. Highlighting for Contrast
Highlighting adds contrast by focusing on the areas of your figure that would naturally catch the light. This technique makes the model appear more dynamic and lifelike.
- How It Works: After applying a base color, use a fine brush to apply lighter shades on the topmost edges of the figure, such as the tips of shoulders, the tops of helmets, and the knees of trousers.
- Best Uses: Highlighting is effective on skin, fabric edges, and raised armor pieces.
- Pro Tip: Blend your highlights with the base color to avoid sharp contrasts, unless you're going for a highly stylized look.
Creating Realistic Uniforms and Fabric Textures
Uniforms are one of the most important aspects of any military figure, and creating a realistic fabric effect can be tricky at this scale. However, with the right approach, you can simulate the texture and wear of fabric.
1. Simulating Fabric Weave
- How It Works: To simulate the weave of fabric, you can use a very fine brush or a stippling technique. Lightly tapping your brush against the figure’s clothing can create a slight texture that mimics fabric.
- Pro Tip: Use matte paints for fabric areas to avoid an unrealistic shine, and consider adding a dry brush of a slightly lighter shade to enhance the texture.
2. Adding Wear and Tear
- How It Works: Real uniforms show signs of wear—faded colors, dirt, and wrinkles. To recreate this, use a combination of washes and dry brushing with earth tones or faded colors.
- Pro Tip: For a weathered look, apply thin layers of light brown or gray over the knees, elbows, and lower legs to simulate dust and dirt buildup.
Enhancing Skin Tones and Facial Features
Even at 1/72 scale, human figures can benefit from detailed skin tones and facial expressions.
1. Layering Skin Tones
- How It Works: Start with a mid-tone skin color and then add depth using washes. Highlight raised areas like cheekbones, noses, and knuckles with a lighter shade.
- Best Uses: This technique is essential for figures with exposed skin, such as soldiers with rolled-up sleeves or civilians.
- Pro Tip: Avoid using pure white or black for highlights and shadows. Instead, use warmer tones like beige or pink for highlights and light browns for shadows.
2. Detailing Faces
At this scale, painting facial features can be challenging, but small details make a big difference.
- How It Works: Use a fine-tip brush for facial details. Focus on adding tiny dots of darker color for the eyes and mouth, and use washes to accentuate the contours of the face.
- Pro Tip: Don’t overdo it. At this small scale, subtlety is key. A light wash over the face can bring out details without requiring intricate painting of every feature.
Weapons and Equipment Detailing
Weapons and equipment are essential parts of military figures, and adding fine details can significantly enhance their realism.
1. Metallic Surfaces
- How It Works: For metal parts like swords, guns, or helmets, use metallic paints combined with washes to give them a realistic shine. A dark wash followed by a metallic dry brush can add depth and a worn appearance.
- Pro Tip: Avoid making the metal surfaces too shiny, as most military equipment has a matte or slightly weathered appearance. A light dry brush with silver can give the illusion of worn edges.
2. Small Accessories
- How It Works: Don’t overlook small accessories like canteens, pouches, or grenades. These small details add authenticity to your figures.
- Pro Tip: Use contrasting colors to make these accessories stand out, but make sure they match the overall tone of the figure. For example, a brown pouch on a green uniform can provide visual interest without clashing.
Weathering Effects for Added Realism
Weathering is a critical step to give your figures a battle-worn, lived-in appearance. These effects can range from light dust to heavy mud or rust, depending on the environment you're recreating.
1. Dust and Dirt
- How It Works: Use a light wash of earth tones, or dry brush with sandy colors to apply dirt and dust to boots, the lower half of the figures, and the edges of equipment.
- Pro Tip: Focus on areas where dirt would naturally accumulate, like the bottom of coats or the knees of pants.
2. Rust and Wear on Metal
- How It Works: Rust effects can be added by applying a reddish-brown wash to metallic surfaces, such as weapons or vehicle parts.
- Pro Tip: Apply rust sparingly to avoid overdoing it. Focus on areas where metal would be exposed to the elements, like the edges of weapons or joints on armor.
Customizing Bases for Extra Detail
The base of your 1/72 figure adds context and enhances the overall realism. A simple base can be transformed into a battlefield, a street corner, or any other setting that complements your figure.
1. Terrain Materials
- How It Works: Use fine sand, static grass, or small stones to create realistic terrain on your figure’s base. Glue these materials down and paint over them to match the environment you’re depicting.
- Pro Tip: Add extra details like fallen leaves, debris, or even small tufts of grass to bring the base to life.
2. Snow, Mud, and Water Effects
- How It Works: Special effects like snow or mud can be added using specialized products or homemade solutions like baking soda for snow or acrylic paste for mud.
- Pro Tip: For water effects, use clear resin or gloss varnish to create puddles or streams, adding an extra dimension to your scene.
Conclusion
Adding texture and detail to 1/72 figures is an art that requires patience, precision, and practice. By mastering techniques like dry brushing, washing, and highlighting, you can bring your figures to life with realistic textures. Paying close attention to uniforms, skin tones, weapons, and weathering effects ensures your models stand out and tell a story. With the right tools, techniques, and attention to detail, you can transform your 1/72 figures from simple miniatures into historically accurate, lifelike representations.
Our Social Pages:
https://plastic-models-store.com/
https://www.facebook.com/plastic.models.store
https://www.instagram.com/plastic_models_store/
https://www.youtube.com/channel/UCKpiM8Q6k2XjOwN9lW0fOrw